

Mazirek, Kraul Death Priest is one of those cards players keep asking about. Here is, in plain words, what its official text says, the rulings published by Wizards of the Coast, and the combos players actually run.
Official card text
Flying Whenever a player sacrifices another permanent, put a +1/+1 counter on each creature you control.
Complete guide
Mazirek, Kraul Death Priest is a powerful commander that turns every loss on the battlefield into a permanent gain for your army. As a flying Insect Shaman, it oversees the cycle of death and growth, rewarding you whenever any player is forced to part with their permanents. Whether you are sacrificing your own creatures for value or forcing an opponent to clear their board, Mazirek ensures your creatures grow larger with every sacrifice.
Understanding the Trigger
Mazirek's ability triggers whenever a player sacrifices another permanent. This includes yourself and your opponents. Importantly, Mazirek does not provide a way to sacrifice permanents on its own; you must use other spells or abilities to initiate the sacrifice. Note that effects like the 'legend rule' or simply a creature dying from combat damage do not count as sacrifices and will not trigger this ability.
Step-by-Step Resolution
When a sacrifice occurs, Mazirek's ability is placed on the stack. If the sacrifice was part of a cost for a spell or ability, Mazirek's trigger will go on top of that spell and resolve first. Once the trigger resolves, every creature you control at that moment receives a +1/+1 counter. If Mazirek is sacrificed at the same time as other permanents, its ability will still trigger for those other permanents, but it won't be on the battlefield to receive counters itself.
Common Mistakes
A frequent error is assuming that Mazirek triggers when a permanent is destroyed or put into the graveyard from the library. The Oracle text specifies 'sacrifices,' which is a specific keyword in Magic. Another common mistake involves timing: remember that the +1/+1 counters are only placed on creatures you control as the trigger resolves. Creatures that enter the battlefield after the trigger has resolved will not receive counters.
When to Play Mazirek
Mazirek shines in 'Aristocrats' style decks that utilize sacrifice outlets to generate value. It is best deployed when you have a wide board of creatures or tokens ready to be buffed. Because it triggers off opponents' sacrifices as well, it is particularly devastating against decks that rely on Fetch lands or Edict effects.
Interaction examples
 Solemn Simulacrum
If you have a way to sacrifice Solemn Simulacrum, such as an external sacrifice outlet, Mazirek's ability will trigger. First, you pay the cost to sacrifice the Simulacrum. Mazirek's ability goes on the stack. When the trigger resolves, all your creatures get a +1/+1 counter. Then, the Simulacrum's own 'dies' trigger resolves, allowing you to draw a card.
 Roaming Throne
If Roaming Throne enters the battlefield and you choose 'Insect' or 'Shaman' as the creature type, it becomes a copy of that type. Now, whenever any player sacrifices another permanent, Mazirek's ability triggers twice thanks to Roaming Throne's replacement effect. Each of your creatures will receive two +1/+1 counters instead of one for every single sacrifice.
Guide written with AI from the official text and rulings. Official English text prevails.
How it works : Mazirek, Kraul Death Priest
Original English text — Wizards of the Coast / Scryfall
- #1· Wizards of the Coast
A legendary permanent that is put into a graveyard because of the "legend rule" isn't sacrificed.
No other card is named in this ruling.
- #2· Wizards of the Coast
If you sacrifice Mazirek and other permanents at the same time, Mazirek's last ability triggers for the other permanents.
No other card is named in this ruling.
- #3· Wizards of the Coast
If you sacrifice a permanent as part of casting a spell or activating an ability, Mazirek's last ability will resolve before that spell or ability.
No other card is named in this ruling.
- #4· Wizards of the Coast
Mazirek's last ability is a triggered ability, not an activated ability. It doesn't allow you to sacrifice a permanent whenever you want; rather, you need some other way of sacrificing permanents.
No other card is named in this ruling.
Popular combos
Real combos played by the community, sorted by popularity.


Basking Broodscale + Mazirek, Kraul Death Priest
- 1Activate Basking Broodscale's adapt ability by paying

 , putting a +1/+1 counter on it.
- 2Basking Broodscale triggers, creating a 0/1 Eldrazi Spawn creature token.
- 3Activate the Eldrazi Spawn by sacrificing it, adding
 .
- 4Mazirek triggers, putting a +1/+1 counter on each creature you control.
- 5Repeat from step 2.

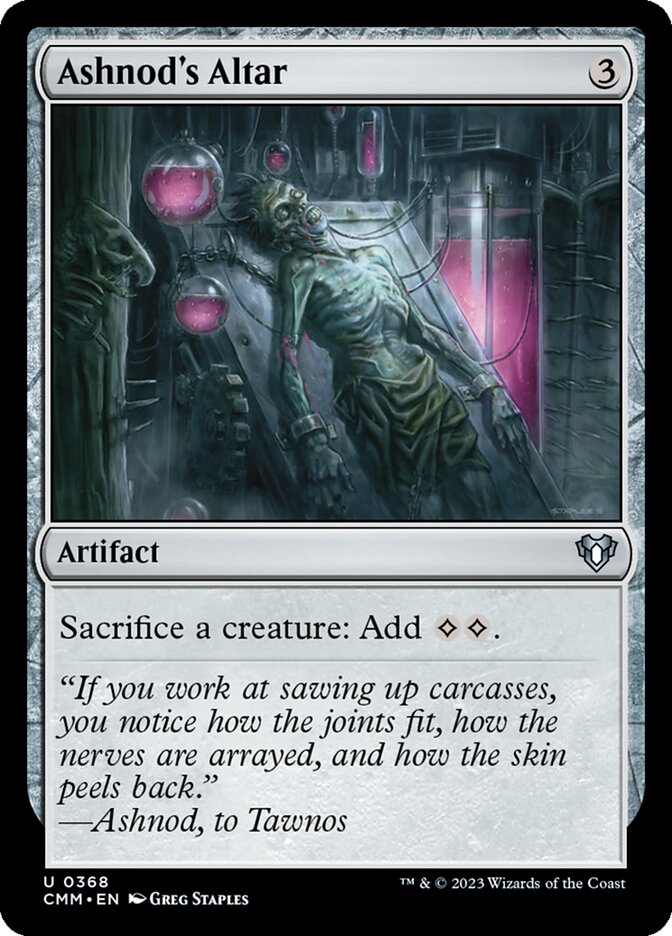
Mazirek, Kraul Death Priest + Scurry Oak + Ashnod's Altar
- 1Activate Ashnod's Altar by sacrificing another creature, adding .
- 2Mazirek triggers, putting a +1/+1 counter on each creature you control.
- 3Scurry Oak triggers, creating a 1/1 Squirrel creature token.
- 4Repeat.

Ghave, Guru of Spores + Mazirek, Kraul Death Priest + Ashnod's Altar
- 1Activate Ghave's first ability by paying and removing a +1/+1 counter from a creature you control, creating a 1/1 Saproling creature token.
- 2Activate Ashnod's Altar by sacrificing the Saproling, adding .
- 3Mazirek triggers, putting a +1/+1 counter on each creature you control.
- 4Repeat.
- 5Once you have infinite mana and +1/+1 counters, you may stop sacrificing the Saprolings to get infinite creature tokens.

Mazirek, Kraul Death Priest + Scurry Oak + Viscera Seer
- 1Activate Viscera Seer by sacrificing another creature.
- 2Mazirek triggers, putting a +1/+1 counter on each creature you control.
- 3Scurry Oak triggers, creating a 1/1 Squirrel creature token.
- 4Resolve the Viscera Seer ability, causing you to scry 1.
- 5Repeat.

Mazirek, Kraul Death Priest + Putrid Goblin + Viscera Seer
- 1Activate Viscera Seer by sacrificing Putrid Goblin.
- 2Putrid Goblin dies, triggering its persist ability and Mazirek.
- 3Resolve the Putrid Goblin trigger, returning it from your graveyard to the battlefield with a -1/-1 counter on it.
- 4Resolve the Mazirek trigger, putting a +1/+1 counter on each creature you control.
- 5Resolve the Viscera Seer ability from step 1, causing you to scry 1.
- 6Repeat.

Ghave, Guru of Spores + Mazirek, Kraul Death Priest + Utopia Mycon
- 1Activate Ghave's first ability by paying and removing a +1/+1 counter from a creature you control, creating a 1/1 Saproling creature token.
- 2Activate Utopia Mycon by sacrificing the Saproling, adding .
- 3Mazirek triggers, putting a +1/+1 counter on each creature you control.
- 4Repeat.

Mazirek, Kraul Death Priest + Scurry Oak + Phyrexian Altar
- 1Activate Phyrexian Altar by sacrificing another creature, adding one mana of any color.
- 2Mazirek triggers, putting a +1/+1 counter on each creature you control.
- 3Scurry Oak triggers, creating a 1/1 Squirrel creature token.
- 4Repeat.

Ghave, Guru of Spores + Cryptic Trilobite + Mazirek, Kraul Death Priest
- 1Activate Cryptic Trilobite's first ability by removing a +1/+1 counter from it, adding .
- 2Activate Ghave's first ability by paying and removing a +1/+1 counter from Cryptic Trilobite, creating a 1/1 Saproling creature token.
- 3Activate Ghave's second ability by paying and sacrificing the Saproling token.
- 4Mazirek triggers, putting a +1/+1 counter on each creature you control.
- 5Resolve the Ghave ability, putting a +1/+1 counter on Cryptic Trilobite.
- 6Activate Cryptic Trilobite's first ability by removing a +1/+1 counter from it, adding .
- 7Activate Ghave's first ability by paying and removing a +1/+1 counter from any creature you control, creating a 1/1 Saproling creature token.
- 8Repeat from step 3.
Legal formats
Commentaires
- Sois le premier à commenter cette carte.