

Blade of the Bloodchief is one of those cards players keep asking about. Here is, in plain words, what its official text says, the rulings published by Wizards of the Coast, and the combos players actually run.
Official card text
Whenever a creature dies, put a +1/+1 counter on equipped creature. If equipped creature is a Vampire, put two +1/+1 counters on it instead. Equip
Complete guide
Blade of the Bloodchief is a powerful Equipment that rewards you every time a creature leaves the battlefield for the graveyard. It is particularly devastating in tribal decks, as it offers double the benefits to Vampires. Whether your own creatures are dying or you are clearing your opponent's board, this artifact ensures your equipped creature grows into a massive threat.
Feeding the Blade
The core mechanic of Blade of the Bloodchief is a triggered ability that watches for creatures dying. In Magic terms, 'dies' means a creature is put into a graveyard from the battlefield. It does not matter who owned or controlled the creature; if a token disappears or a legendary creature falls in battle, the trigger goes on the stack. The ability checks if the equipped creature is a Vampire only at the moment the ability resolves to determine if it gets one counter or two.
Resolving the Trigger
When a creature dies, the ability triggers and players can respond. By the time the ability resolves, the game checks which creature is currently wearing the Blade. If the Blade has been moved to a new creature since the trigger occurred, the new creature gets the counters. If the Blade leaves the battlefield entirely before resolution, the game looks back in time and places the counters on whichever creature was equipped at the moment the Blade disappeared.
Timing and State-Based Actions
A common mistake involves combat math. If the equipped creature and an opponent's creature take lethal damage simultaneously, they both die at the same time. While the Blade will trigger, the creature it was attached to is already in the graveyard and cannot receive the counters. Additionally, remember that while the counters stay on the creature if the Blade is moved, the Blade itself does not hold the power; moving the Equipment simply starts the process over on a new host.
When to Play It
This card is most effective in decks with high creature turnover, such as aristocrat strategies or heavy control builds. Since it costs only one mana to cast and one mana to equip, it is easy to deploy early alongside mana rocks. It turns every trade in combat into a permanent advantage for your board state.
Interaction examples
 Sol Ring
On turn one, you can tap a land for mana to cast Sol Ring. Use the two colorless mana from Sol Ring to cast Blade of the Bloodchief and then pay its equip cost to attach it to a creature you played. This setup allows you to start collecting +1/+1 counters as early as turn two.
 Arcane Signet
If you are playing a multi-color Vampire deck, Arcane Signet ensures you have the correct colors to cast your Vampires. Once your Vampire is on the field, use any mana to equip the Blade of the Bloodchief. Now, whenever any creature dies, Arcane Signet helps keep your mana open for responses while your Vampire receives two +1/+1 counters per death instead of the usual one.
If you have a creature equipped with Blade of the Bloodchief and you cast a spell that destroys all other creatures, the Blade will trigger for every other creature that died. All those counters will be placed on your surviving equipped creature, likely making it large enough to end the game in a single swing.
Guide written with AI from the official text and rulings. Official English text prevails.
How it works : Blade of the Bloodchief
Original English text — Wizards of the Coast / Scryfall
- #1· Wizards of the Coast
Blade of the Bloodchief's ability triggers regardless of who controlled the creature and whose graveyard it was put into.
No other card is named in this ruling.
- #2· Wizards of the Coast
The +1/+1 counters are put on the equipped creature, not Blade of the Bloodchief. If Blade of the Bloodchief is moved to a different creature, the +1/+1 counters will stay where they are.
No other card is named in this ruling.
- #3· Wizards of the Coast
The creature that gets the counters is the one that's equipped by Blade of the Bloodchief at the time the ability resolves. It doesn't matter what creature Blade of the Bloodchief was attached to (if any) when it triggered.
No other card is named in this ruling.
- #4· Wizards of the Coast
If Blade of the Bloodchief leaves the battlefield before its triggered ability resolves, the counters are put on the creature it was attached to at the time it left the battlefield. If it wasn't attached to a creature at that time, nothing gets the counters.
No other card is named in this ruling.
- #5· Wizards of the Coast
If the equipped creature itself is put into a graveyard, Blade of the Bloodchief's ability will trigger. However, it won't do anything when it resolves unless a spell or ability has caused it to become attached to another creature by that time. (Remember that you may activate an equip ability only as a sorcery.)
No other card is named in this ruling.
- #6· Wizards of the Coast
If the equipped creature and another creature are dealt lethal damage at the same time, the equipped creature will be put into a graveyard before it would receive any counters.
No other card is named in this ruling.
Popular combos
Real combos played by the community, sorted by popularity.


Basking Broodscale + Blade of the Bloodchief
- 1Put a +1/+1 counter on Basking Broodscale.
- 2Basking Broodscale triggers, creating a 0/1 Eldrazi Spawn creature token.
- 3Activate the Eldrazi Spawn by sacrificing it, adding
 .
- 4When the Eldrazi Spawn dies, Blade of the Bloodchief triggers, putting a +1/+1 counter on Basking Broodscale.
- 5Repeat from step 2.

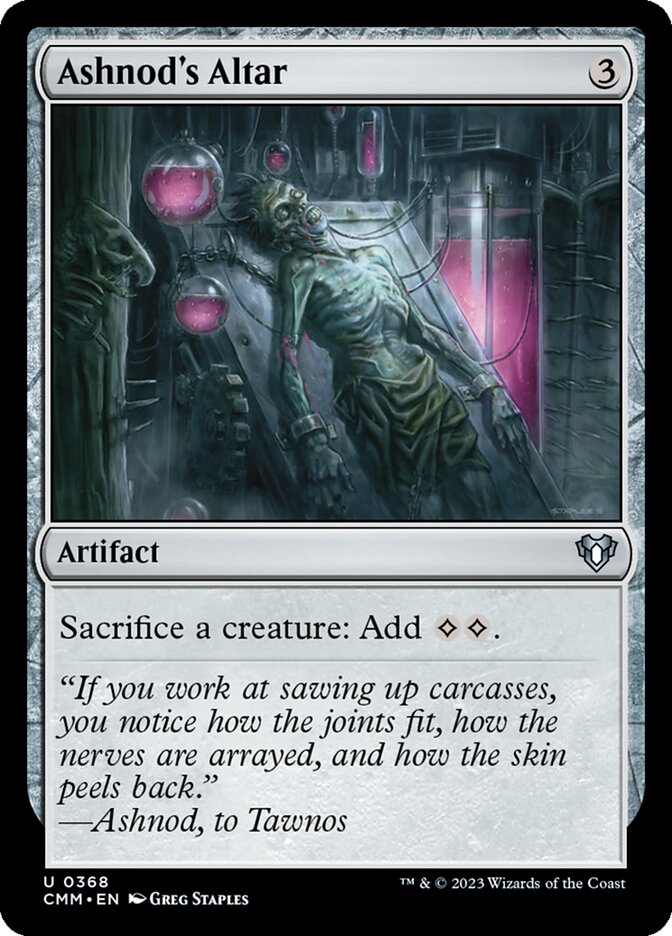
Blade of the Bloodchief + Animation Module + Ashnod's Altar
- 1Activate Ashnod's Altar by sacrificing any other creature you control, adding .
- 2Blade of the Bloodchief triggers, putting a +1/+1 counter on the creature it is attached to.
- 3Animation Module triggers, causing you to pay
 to create a 1/1 Servo artifact creature token.
- 4Repeat.
- 5Once you have infinite +1/+1 counters on the creature with Blade of the Bloodchief attached, you may activate Blade of the Bloodchief's equip ability, attaching it to another creature you control.
- 6If you do, you may repeat step 5 for each creature you control.


Elenda, the Dusk Rose + Phyrexian Altar + Blade of the Bloodchief
- 1Activate Phyrexian Altar by sacrificing Elenda, adding
 .
- 2Choose to return Elenda from your graveyard to the command zone.
- 3When Elenda dies, it triggers, creating a number of 1/1 Vampire creature tokens equal to its power.
- 4Cast Elenda from the command zone by paying


 plus commander tax, if applicable.
- 5Activate Blade of the Bloodchief's equip ability by paying , attaching it to Elenda.
- 6Activate Phyrexian Altar by sacrificing a Vampire token, adding .
- 7When the Vampire dies, Elenda and Blade of the Bloodchief trigger, putting three +1/+1 counters on Elenda.
- 8Repeat from step 6 for each Vampire token.
Blade of the Bloodchief + Animation Module + Phyrexian Altar
- 1Activate Phyrexian Altar by sacrificing any other creature you control, adding .
- 2Blade of the Bloodchief triggers, putting a +1/+1 counter on the creature it is attached to.
- 3Animation Module triggers, causing you to pay to create a 1/1 Servo artifact creature token.
- 4Repeat.

Blade of the Bloodchief + Scurry Oak + Ashnod's Altar
- 1Activate Ashnod's Altar by sacrificing another creature, adding .
- 2When the creature dies, Blade of the Bloodchief triggers, putting a +1/+1 counter on Scurry Oak.
- 3Scurry Oak triggers, creating a 1/1 Squirrel creature token.
- 4Repeat.
Blade of the Bloodchief + Scurry Oak + Phyrexian Altar
- 1Activate Phyrexian Altar by sacrificing another creature, adding one mana of any color.
- 2When the creature dies, Blade of the Bloodchief triggers, putting a +1/+1 counter on Scurry Oak.
- 3Scurry Oak triggers, creating a 1/1 Squirrel creature token.
- 4Repeat.

Blade of the Bloodchief + Animation Module + Krark-Clan Ironworks
- 1Activate Krark-Clan Ironworks by sacrificing any other artifact you control, adding .
- 2Blade of the Bloodchief triggers, putting a +1/+1 counter on the creature it is attached to.
- 3Animation Module triggers, causing you to pay to create a 1/1 Servo artifact creature token.
- 4Repeat.
- 5Once you have infinite +1/+1 counters on the creature with Blade of the Bloodchief attached, you may activate Blade of the Bloodchief's equip ability, attaching it to another creature you control.
- 6If you do, you may repeat step 5 for each creature you control.

Blade of the Bloodchief + Pentavus + Ashnod's Altar
- 1Activate Ashnod's Altar by sacrificing another creature, adding .
- 2When the creature dies, Blade of the Bloodchief triggers, putting a +1/+1 counter on Pentavus.
- 3Activate Pentavus' first ability by paying and removing a +1/+1 counter from it, creating a 1/1 Pentavite artifact creature token.
- 4Repeat.
Legal formats
Commentaires
- Sois le premier à commenter cette carte.
Read next
Meta decks with Blade of the Bloodchief
No archived Top 8 deck with this card yet.