
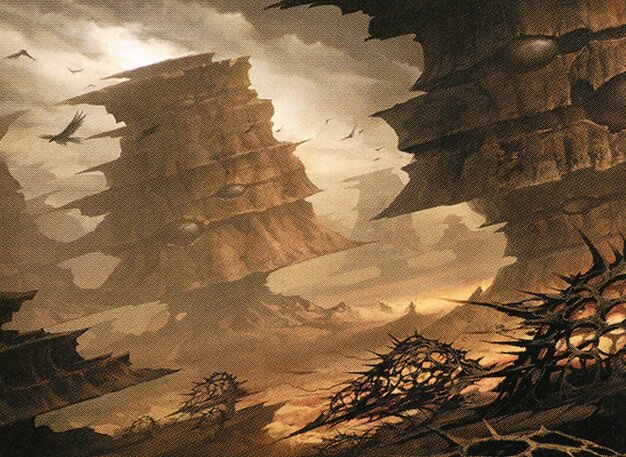
Arid Mesa is one of those cards players keep asking about. Here is, in plain words, what its official text says, the rulings published by Wizards of the Coast, and the combos players actually run.
Official card text
, Pay 1 life, Sacrifice this land: Search your library for a Mountain or Plains card, put it onto the battlefield, then shuffle.
Complete guide
Arid Mesa is a premier 'fetch land' that provides exceptional mana fixing and deck thinning for decks containing Red or White. By trading a small amount of life, you gain immediate access to the specific resources your strategy requires. Mastering this card is essential for competitive play in formats like Modern and Commander.
What Arid Mesa Does
Arid Mesa is a nonbasic land with an activated ability that costs one life and requires you to sacrifice the land itself. Unlike basic lands, it does not tap for mana directly. Instead, it allows you to search your library for a card with the Mountain or Plains subtype and put it directly onto the battlefield. This can include basic Mountains and Plains, but also any nonbasic lands that possess those specific land types.
Resolving the Ability Step-by-Step
First, you activate the ability by tapping Arid Mesa, paying 1 life, and putting Arid Mesa into your graveyard as a cost. This ability goes on the stack and can be responded to. If it resolves, you search your library for a Mountain or Plains card. Once you find the card, you put it onto the battlefield. Finally, you must shuffle your library, regardless of whether you found a card or not.
Common Mistakes
A frequent error is assuming Arid Mesa can only find basic lands. It can find any land with the 'Mountain' or 'Plains' type line. Another mistake is forgetting the life payment; this is a cost, not an effect, so you must pay it even if the ability is countered. Lastly, remember that you cannot search for a card that doesn't have the specific subtype; for example, you cannot fetch a land that only says 'Land' even if it produces red or white mana.
Strategic Timing
Usually, it is best to wait until the end of your opponent's turn to activate Arid Mesa. This keeps your options open, allowing you to react to their plays or choose the exact color you need for your upcoming turn. However, if you need a specific color of mana to cast a spell during your own turn, you should activate it immediately during your main phase.
Interaction examples
If your hand has several white spells but you only have red mana available, you can sacrifice Arid Mesa to search for a Plains. This puts the Plains onto the battlefield untapped, allowing you to cast your white spells right away.
 Command Tower
While Command Tower stays on the battlefield to produce mana every turn, Arid Mesa is a one-time use that swaps itself for a permanent land. If you need a specific land type to trigger other abilities, Arid Mesa is the better choice, whereas Command Tower is better for consistent multi-color access without losing life.
 Exotic Orchard
 depends entirely on what your opponents have played to produce mana. If your opponent controls no lands that produce white or red, Exotic Orchard won't help you cast your spells. In this scenario, using Arid Mesa is superior because it guarantees you find the Mountain or Plains you need directly from your own deck.
Guide written with AI from the official text and rulings. Official English text prevails.
How it works : Arid Mesa
Original English text — Wizards of the Coast / Scryfall
No additional ruling has been published for this card.
Popular combos
Real combos played by the community, sorted by popularity.


Kodama of the East Tree + Ghost Town + Scute Swarm + Arid Mesa
- 1Fetch a land using Arid Mesa.
- 2When the fetched land enters, Scute Swarm and Kodama trigger.
- 3Resolve the Kodama trigger, putting Ghost Town from your hand onto the battlefield.
- 4When Ghost Town enters, Kodama and Scute Swarm trigger.
- 5Holding priority, activate Ghost Town's first abiltiy by tapping it, adding
 .
- 6Activate Ghost Town's second ability by paying
 , returning it from the battlefield to your hand.
- 7Resolve the Scute Swarm from step 4, creating a token.
- 8When the token enters, Kodama triggers, putting Ghost Town from your hand onto the battlefield.

Kodama of the East Tree + Ghost Town + Tireless Provisioner + Arid Mesa
- 1Fetch a land using Arid Mesa.
- 2When the fetched land enters, Tireless Provisioner and Kodama trigger.
- 3Resolve the Kodama trigger, putting Ghost Town from your hand onto the battlefield.
- 4When Ghost Town enters, Kodama and Tireless Provisioner trigger.
- 5Holding priority, activate Ghost Town's first abiltiy by tapping it, adding .
- 6Activate Ghost Town's second ability by paying , returning it from the battlefield to your hand.
- 7Resolve the Tireless Provisioner from step 4, creating a token.
- 8When the token enters, Kodama triggers, putting Ghost Town from your hand onto the battlefield.

Kodama of the East Tree + Ghost Town + Omnath, Locus of Rage + Arid Mesa
- 1Fetch a land using Arid Mesa.
- 2When the fetched land enters, Omnath and Kodama trigger.
- 3Resolve the Kodama trigger, putting Ghost Town from your hand onto the battlefield.
- 4When Ghost Town enters, Kodama and Omnath trigger.
- 5Holding priority, activate Ghost Town's first abiltiy by tapping it, adding .
- 6Activate Ghost Town's second ability by paying , returning it from the battlefield to your hand.
- 7Resolve the Omnath from step 4, creating a token.
- 8When the token enters, Kodama triggers, putting Ghost Town from your hand onto the battlefield.

Kodama of the East Tree + Ghost Town + Field of the Dead + Arid Mesa
- 1Fetch a land using Arid Mesa.
- 2When the fetched land enters, Field of the Dead and Kodama trigger.
- 3Resolve the Kodama trigger, putting Ghost Town from your hand onto the battlefield.
- 4When Ghost Town enters, Kodama and Field of the Dead trigger.
- 5Holding priority, activate Ghost Town's first abiltiy by tapping it, adding .
- 6Activate Ghost Town's second ability by paying , returning it from the battlefield to your hand.
- 7Resolve the Field of the Dead from step 4, creating a token.
- 8When the token enters, Kodama triggers, putting Ghost Town from your hand onto the battlefield.

Kodama of the East Tree + Ghost Town + Rampaging Baloths + Arid Mesa
- 1Fetch a land using Arid Mesa.
- 2When the fetched land enters, Rampaging Baloths and Kodama trigger.
- 3Resolve the Kodama trigger, putting Ghost Town from your hand onto the battlefield.
- 4When Ghost Town enters, Kodama and Rampaging Baloths trigger.
- 5Holding priority, activate Ghost Town's first abiltiy by tapping it, adding .
- 6Activate Ghost Town's second ability by paying , returning it from the battlefield to your hand.
- 7Resolve the Rampaging Baloths from step 4, creating a token.
- 8When the token enters, Kodama triggers, putting Ghost Town from your hand onto the battlefield.

Kodama of the East Tree + Ghost Town + Felidar Retreat + Arid Mesa
- 1Fetch a land using Arid Mesa.
- 2When the fetched land enters, Felidar Retreat and Kodama trigger.
- 3Resolve the Kodama trigger, putting Ghost Town from your hand onto the battlefield.
- 4When Ghost Town enters, Kodama and Felidar Retreat trigger.
- 5Holding priority, activate Ghost Town's first abiltiy by tapping it, adding .
- 6Activate Ghost Town's second ability by paying , returning it from the battlefield to your hand.
- 7Resolve the Felidar Retreat from step 4, creating a token.
- 8When the token enters, Kodama triggers, putting Ghost Town from your hand onto the battlefield.

Kodama of the East Tree + Ghost Town + Tireless Tracker + Arid Mesa
- 1Fetch a land using Arid Mesa.
- 2When the fetched land enters, Tireless Tracker and Kodama trigger.
- 3Resolve the Kodama trigger, putting Ghost Town from your hand onto the battlefield.
- 4When Ghost Town enters, Kodama and Tireless Tracker trigger.
- 5Holding priority, activate Ghost Town's first abiltiy by tapping it, adding .
- 6Activate Ghost Town's second ability by paying , returning it from the battlefield to your hand.
- 7Resolve the Tireless Tracker from step 4, creating a token.
- 8When the token enters, Kodama triggers, putting Ghost Town from your hand onto the battlefield.

Kodama of the East Tree + Ghost Town + Springheart Nantuko + Arid Mesa
- 1Fetch a land using Arid Mesa.
- 2When the fetched land enters, Springheart Nantuko and Kodama trigger.
- 3Resolve the Kodama trigger, putting Ghost Town from your hand onto the battlefield.
- 4When Ghost Town enters, Kodama and Springheart Nantuko trigger.
- 5Holding priority, activate Ghost Town's first abiltiy by tapping it, adding .
- 6Activate Ghost Town's second ability by paying , returning it from the battlefield to your hand.
- 7Resolve the Springheart Nantuko from step 4, creating a token.
- 8When the token enters, Kodama triggers, putting Ghost Town from your hand onto the battlefield.
Legal formats
Commentaires
- Sois le premier à commenter cette carte.
Read next
Meta decks with Arid Mesa
No archived Top 8 deck with this card yet.